
Spring Boot, Apache CXF, Swagger under JAX-RS
This tutorial is about: Making a standard and enterprise JAX-RS Web Service with Spring Boot, Apache CXF, MySQL, and Swagger UI.
Audience
Java Developers who know about Spring and REST standards.
Step 1: Add Maven Dependencies to our project
It’s the time to create a Maven Project and put the below dependencies on your POM.xml file.
<parent>
    <groupId>org.springframework.boot</groupId>
    <artifactId>spring-boot-starter-parent</artifactId>
    <version>1.5.9.RELEASE</version>
</parent>

<properties>
    <cxf.version>3.2.1</cxf.version>
    <swagger-ui.version>3.9.2</swagger-ui.version>
    <h2.version>1.4.196</h2.version>
    <jackson.version>2.9.3</jackson.version>
</properties>

<dependencies>
    <!-- spring dependencies -->
    <dependency>
        <groupId>org.springframework.boot</groupId>
        <artifactId>spring-boot-starter-web</artifactId>
    </dependency>
    <dependency>
        <groupId>org.springframework.boot</groupId>
        <artifactId>spring-boot-starter-data-jpa</artifactId>
    </dependency>

    <!-- Database dependencies -->
    <dependency>
        <groupId>com.h2database</groupId>
        <artifactId>h2</artifactId>
        <version>${h2.version}</version>
    </dependency>

    <!-- Apache CXF dependencies -->
    <dependency>
        <groupId>org.apache.cxf</groupId>
        <artifactId>cxf-spring-boot-starter-jaxrs</artifactId>
        <version>${cxf.version}</version>
    </dependency>
    <dependency>
        <groupId>org.apache.cxf</groupId>
        <artifactId>cxf-rt-rs-service-description-swagger</artifactId>
        <version>${cxf.version}</version>
    </dependency>

    <!-- Jackson dependencies -->
    <dependency>
        <groupId>com.fasterxml.jackson.jaxrs</groupId>
        <artifactId>jackson-jaxrs-json-provider</artifactId>
        <version>${jackson.version}</version>
    </dependency>

    <!-- Swagger dependencies -->
    <dependency>
        <groupId>org.webjars</groupId>
        <artifactId>swagger-ui</artifactId>
        <version>${swagger-ui.version}</version>
    </dependency>

    <!-- Unit testing dependencies -->
    <dependency>
        <groupId>junit</groupId>
        <artifactId>junit</artifactId>
        <version>${junit.version}</version>
        <scope>test</scope>
    </dependency>
</dependencies>
Step 2: Database configurations.
I used H2 to make this application more independent
spring.datasource.url=jdbc:h2:mem:spring-boot-cxf;DB_CLOSE_DELAY=-1;DB_CLOSE_ON_EXIT=FALSE
spring.datasource.platform=h2
spring.datasource.username = sa
spring.datasource.password =
spring.datasource.driverClassName = org.h2.Driver
spring.jpa.database-platform=org.hibernate.dialect.H2Dialect
Spring Boot uses Tomcat Pooling by default which is the best Pooling software in Java.
Step 3: Configuration of CXF
@Configuration
class CXFConfig {
  @Autowired
  private Bus bus;

  @Bean
  public Server rsServer() {
      final JAXRSServerFactoryBean endpoint = new JAXRSServerFactoryBean();
      endpoint.setProvider(new JacksonJsonProvider());
      endpoint.setBus(bus);
      endpoint.setAddress("/");
      endpoint.setServiceBeans(Arrays.<Object>asList(userController()));
      endpoint.setFeatures(Arrays.asList(new Swagger2Feature()));
      return endpoint.create();
  }

  @Bean
  public UserController userController() {
      return new UserController();
  }
}
The default address of API is /services to change the default CXF API address from /services to /api (or anything that you like) just check my Github profile :)
Step 4: Spring Boot starter method
I prefer to keep Spring Boot starter method out of other configuration classes and put your Beans on other Classes.
@SpringBootApplication
public class Starter {

    public static void main(final String[] args) {
        SpringApplication.run(CxfConfig.class, args);
    }
}
Step 5: Run Spring Boot
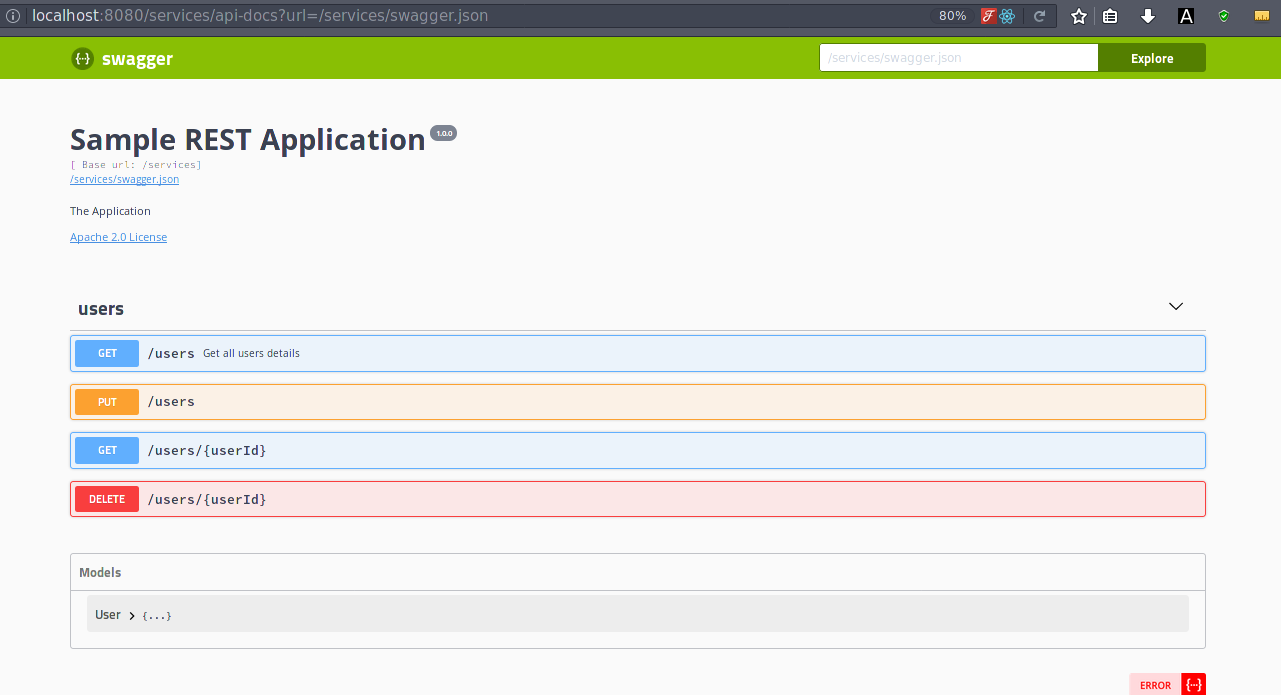
It’s time to see what we have done, we can just run a Boot project with mvn spring-boot:run or use any IDE you like. If your Application is running on PORT 8080 just open http://localhost:8080/services/services then you will see your API links then click the only Swagger UI Link.
Github repo
Just git clone Spring CXF project and run it on your Machine.